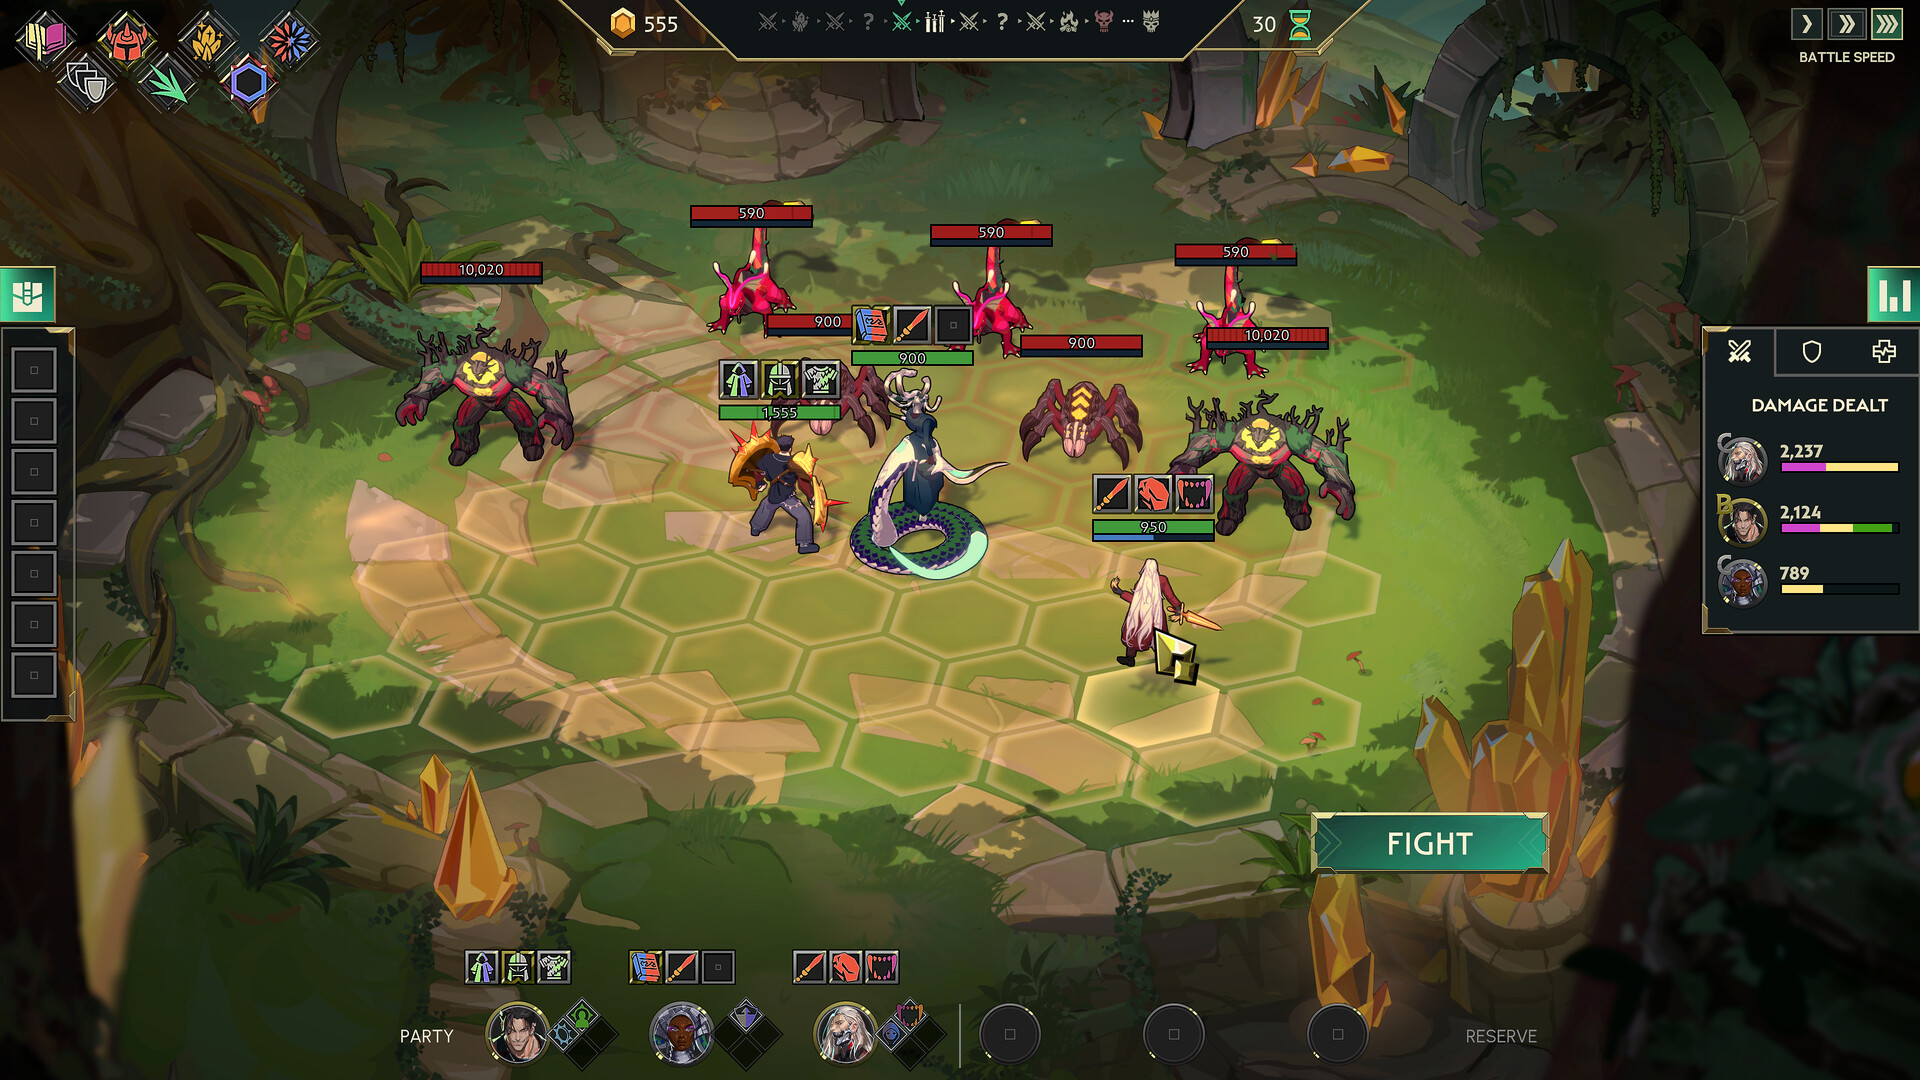
Official sources establish the systems and progression. Positioning and role-coverage advice is a practical community framework, not a guaranteed build or official rule.
This Guildrun beginner guide starts with one rule: build a functional guild before chasing a perfect build. Guildrun is a single-player PvE roguelike autobattler, so your important decisions happen while drafting, developing, and positioning heroes; combat then resolves automatically. On a first run, identify who can absorb early pressure, who turns time into damage, and which choice supports the team already on the board. Read each specialization, item, and relic, then adapt instead of rerolling toward a recipe you may never see. The official Demo supports unhurried play, mid-run saves, unlocks across runs, and a ladder of eight difficulties followed by Endless mode. This page was checked on July 23, 2026. System and progression facts come from official material; role coverage and positioning are clearly labeled community guidance. Because the Demo receives frequent patches, always treat current in-game text as the final authority.
What should a new Guildrun player do first?
Begin by learning how one decision changes the next fight. You do not need to memorize the Demo's large hero, specialization, item, and relic pools. A first run is successful when you can recognize your frontline, your damage plan, and the reason a formation held or collapsed.
Do: read the available effects, cover immediate needs, and leave room to pivot.
Avoid: deciding the final build before the run has shown you its useful offers.
How a Guildrun run works
To understand how to play Guildrun, think in a repeating loop: choose, arrange, watch, learn, and reshape. The official description confirms drafting, leveling, respecializing, items, relics, run-by-run unlocks, and automatic PvE battles without a timer.
Draft a starting direction
Choose from the heroes and early upgrades offered to you. Keep the plan broad enough to change.
Arrange the guild
Place the heroes you want to field and protect units that need time to attack, cast, or scale.
Resolve the fight
Combat is automatic. Watch who is focused first, which heroes act too late, and where the formation breaks.
Take rewards and reshape the team
Level, specialize, equip items, add relics, or respec when the run gives you a better direction.
Repeat and adapt
Carry the lessons from each fight into the next setup instead of treating the opening draft as permanent.
Clear the run to unlock a harder challenge
The Demo has eight difficulties, with the next challenge unlocked after a successful run; Endless follows the ladder.
The most useful information from a fight is not only whether you won. Watch which hero received pressure first, whether an important ability had time to matter, and whether the team could actually finish the encounter. Use that evidence in the next setup.
Drafting your first guild
Draft for jobs before names. A practical beginner framework is to field a hero that can receive early pressure, a hero or interaction that can produce meaningful damage, and support that helps those pieces survive or scale. These are editorial role labels, not permanent in-game classes: Guildrun explicitly allows heroes to move beyond their starting roles through specializations.
- Start with the strongest useful function already offered.
- Add coverage for the team's clearest weakness.
- Prefer a real two-piece interaction over a theoretical late-game combo.
- Re-evaluate after every meaningful specialization, item, or relic.
- Pivot when the new direction is already stronger than the old plan.
If you arrived looking for a Guildrun beginners guide with one mandatory opening draft, there is not enough evidence for an honest universal recipe. The official design goal is adaptation, so a decision framework is more reliable than a fixed hero list.
Hero roles and positioning
Positioning is a decision, not a one-time template. Community explanations of autobattlers emphasize that a fragile damage hero can be removed before reaching a power spike when placed under immediate pressure. Inspect the opposing formation, decide who should be engaged first, and protect the units that need time.
| Role | What it does | Typical position | Beginner check |
|---|---|---|---|
| Frontline | Absorbs early pressure or buys time for the team. | Where enemies are most likely to engage first. | If this hero falls immediately, the rest of the plan may never start. |
| Damage | Converts the team's setup into kills through attacks or abilities. | Protected when fragile; adjusted to reach useful targets. | Survival is only useful if the team can also finish encounters. |
| Support or control | Helps allies survive, scale, cast, or disrupt the opposing formation. | Safe enough to deliver the effect the team depends on. | A support pick should strengthen an active plan, not merely fill a slot. |
The table uses editorial categories to make decisions easier. A specialization can change a hero's job, so reassign the label whenever the actual ability and effect text says the hero now serves a different purpose.
Items, relics and specializations
All three systems increase power, but they answer different questions. Specializations reshape a hero, items should be assigned to a hero that can use them, and relics can make a broader run direction more attractive. Exact effects can change, so this guide does not replace the current tooltip.
| System | How to think about it | Beginner question | Evidence |
|---|---|---|---|
| Specializations | Choices that reshape how an individual hero develops and can move that hero beyond the starting class. | Does this reinforce the hero's current job or create a better pivot? | Officially confirmed |
| Items | Hero-focused equipment that should be matched to the unit most able to use its effect. | Who converts this effect into useful survival, damage, or tempo now? | Official + data reference |
| Relics | Run-shaping effects that can strengthen a wider team plan and make a new synergy worth pursuing. | Does this help several current choices, or only a build you do not have? | Official + data reference |
Useful Guildrun tips begin with the present board: choose the effect that fixes a current weakness or multiplies an interaction you already have. A rarer-looking option for a missing future build may add less than a simple effect your active guild can use immediately.
Early difficulty progression
Officially confirmed: the Demo contains eight difficulties. Each successful run unlocks a harder challenge, and Endless mode follows the difficulty ladder.
Unlocking a difficulty does not mean you must force the same winning build into it. Before moving up, make sure you can explain:
- Who handled the opening pressure.
- How the team converted time into damage.
- Which item, relic, or specialization was essential rather than merely helpful.
- Which formation or enemy pattern almost broke the plan.
- What you would change if one core offer did not appear.
Then try the next difficulty as a learning step. Fresh modifiers may expose a weak frontline, a slow damage plan, or an inflexible draft. Return to the decision that failed instead of assuming the solution is always a different hero.
When you reach the final high-difficulty challenge, use the Guildrun Red Rift guide to separate its current missions from provisional community strategy.
Common beginner mistakes
Most first-run mistakes come from committing too early or reading the result too late. The corrections below are deliberately conditional: they are learning tools, not guaranteed-win rules.
First-run checklist
Use this static checklist as a short reset before, during, and after a run. It introduces no mechanics beyond those explained above.
Guildrun beginner guide FAQ
Is Guildrun easy to learn?
Guildrun has no PvP timer and lets you think between automatic fights, but its large pool of heroes, specializations, items, and relics creates depth. Learn the run loop and role coverage first; optimization can wait.
How does a run work in Guildrun?
You draft and develop a guild, arrange heroes before automatic combat, review the result, take upgrades and rewards, then adapt for the next encounter. A successful run unlocks the next difficulty.
What should I draft first in Guildrun?
Draft a functional direction rather than a fixed recipe. Make sure someone can absorb pressure, someone can convert time into damage, and every additional pick supports a real need or synergy.
How should I position heroes in Guildrun?
Place the intended frontline where it can receive early pressure and protect fragile heroes that need time to attack, cast, or scale. Recheck the opposing formation instead of relying on one permanent layout.
What is the difference between items, relics, and specializations?
Specializations reshape an individual hero's development, items are equipped to heroes, and relics can shape the wider run. Read the current in-game text because exact effects can change with patches.
When should a beginner increase the difficulty?
Try the newly unlocked difficulty when you can explain why the previous clear worked and can identify the team's frontline, damage plan, and failure risks. A single lucky combination is not the only readiness signal.
Are these Guildrun tips officially confirmed?
The game format, adaptation focus, unlocks, systems, and difficulty ladder come from official material. Role-coverage and positioning advice is community guidance, not an official rule or guaranteed strategy.
Sources consulted
Official sources establish the Demo's systems, progression, and intended focus on adaptation. Community material supports only the beginner positioning framework. The unofficial data reference is used for terminology and labels itself as unaffiliated with Leyline.